|
|
Tutorial: Menu Boards |
|
|
Tutorial: Menu Boards |
Menu Boards are a great way to inform customers of specials or to promote your menu items. Creating a menu board is a two step process - first you need to create the board itself, then you can add items to it. In this tutorial we will discuss how to create a sophisticated menu board and add a few items to it. This will give you a starting point for your own extensive menu board to display at one of your Vision terminals.
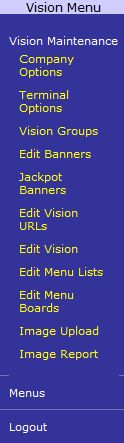
If the Portal's Navigation Menu is not already in the Vision Menu, start by navigating to the Vision menu by clicking the Menus link followed by Vision. Open Vision Maintenance by clicking on the link and a drop-down list of menu items will be displayed. A link is provided to allow you to open the Company Options for the Vision system. Click on Edit Menu Boards to open the Online Message Board Advertising Editor for your company. Later we will discuss Menu Lists which are lists of items displayed on the menu boards. Menu Lists can be accessed from the Edit Menu Lists screen.
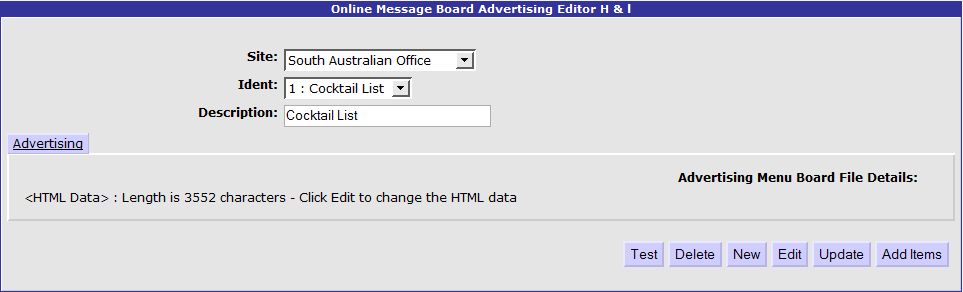
In the Online Message Board Advertising Editor you can create menu boards by site or for all sites at once. If you have created at least one menu board in the Portal then it will be selected and some basic details will be displayed. From here you are able to select a menu board and test it by pressing the Test button or edit the menu board by pressing the Edit button. The other buttons can be pressed to create a New menu board, Delete the selected menu board, Update the Vision Portal with the changes that have been made or add items to the selected menu board through the use of the Add Items button. In this tutorial we will create a new menu board from scratch, add some items to it, test it on our screen and then update the portal to save the changes, but note that the steps are very similar to edit an existing menu board.
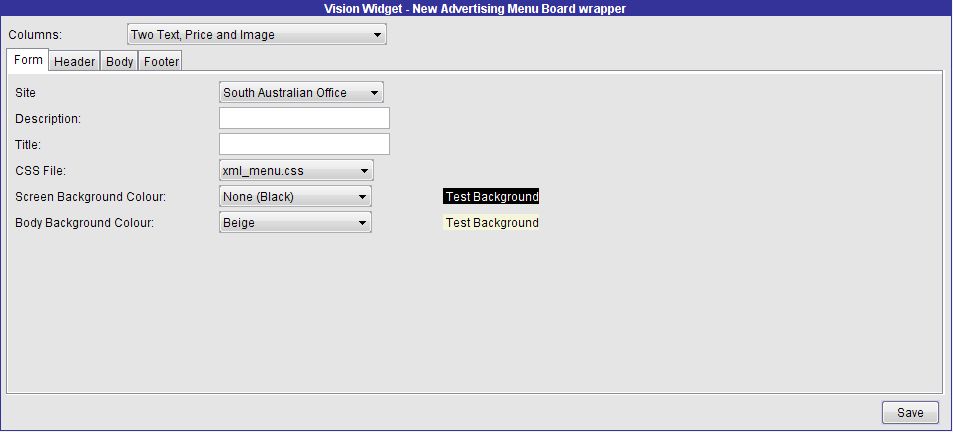
Press the New button to start a new menu board and the New Menu Board screen loads. Select the column style from the drop-down list. There are four tabs in the screen to detail the style of the menu - Form, Header, Body and Footer. Enter the following details for each tab:
Form: Double-check the site selection and enter a description and title for the menu board. Select the CSS stylesheet and background colours for the board.
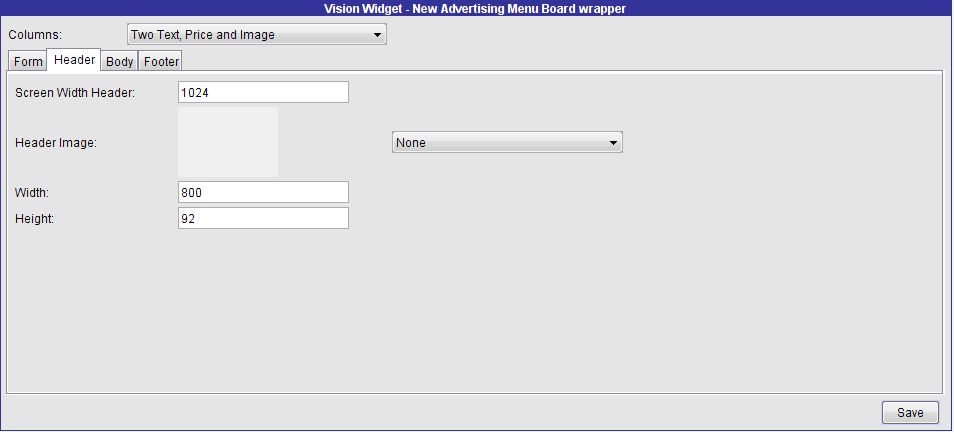
Header: Enter the screen width for the header ensuring that it is not wider than the screen itself. Select an image to display in the header if desired and enter the dimensions of the image in the Width and Height fields.
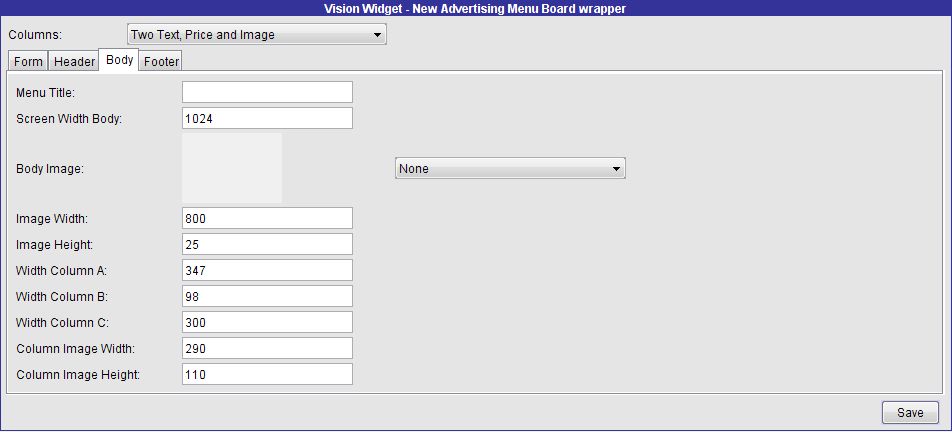
Body: Enter a title to be displayed in the Menu and the width of the body of the menu, ensuring that it is not wider than the screen. If desired, select an image to display in the body of the menu and enter its dimensions in the Image Width and Image Height fields. Also you can adjust the widths of the columns of the menu board.
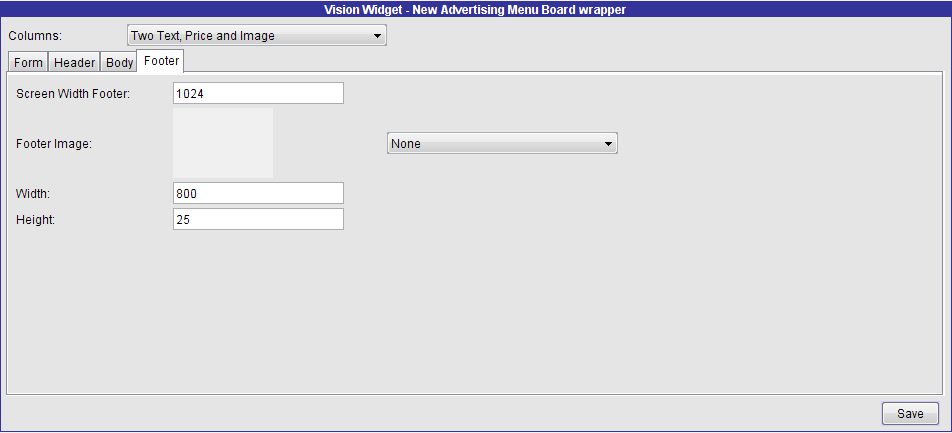
Footer: Enter the width of the footer, ensuring that it is not wider than the screen. Select an image to display in the footer and enter its dimensions in the Width and Height fields.
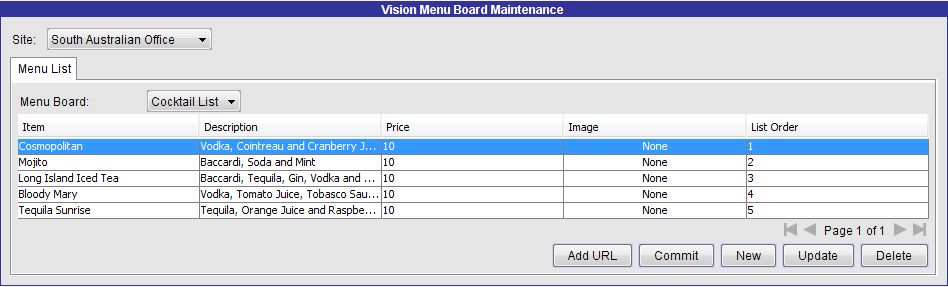
Press the Save button when all of the details have been entered to return to the Online Message Board Advertising Editor. Your new menu board should be selected in the list. Next we need to add some items to the menu. Press the Add Items button or the Edit Menu Lists link in the Navigation Menu to open the Vision Menu Board Maintenance screen. Make sure that the Site and Menu Board are correctly selected. Press the New button to add a new item and enter the item name in the Item column. Describe the item in the Description column and enter a Price for the item. Select an Image for the item. After you have added several items to your menu board, you can order the items by entering numbers in the List Order column where 1 is the first item in the list, 2 is second and so on. Once you have finished adding items, press the Commit button to commit the changes to the Portal.
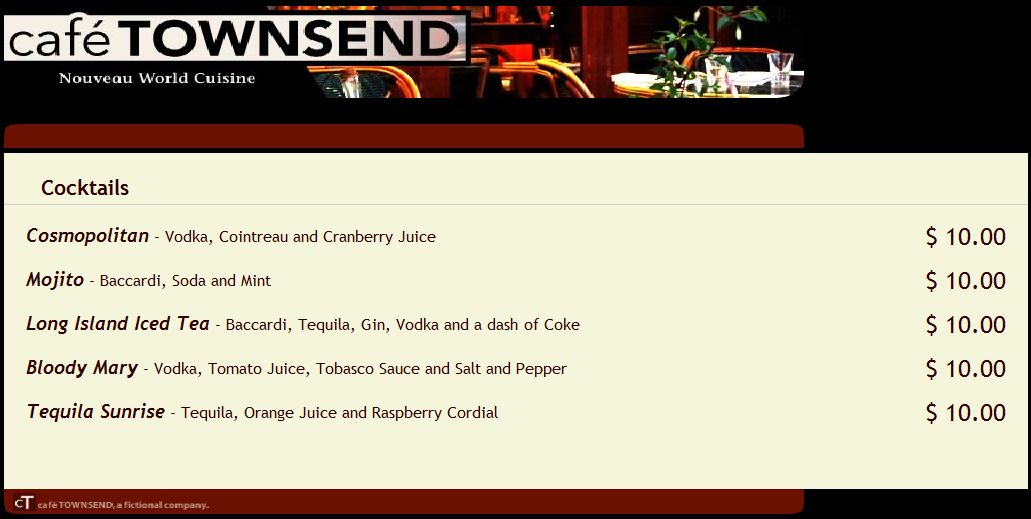
When you have finished adding items to the menu board you can test it by pressing the Test button in the Online Message Board Advertising Editor.
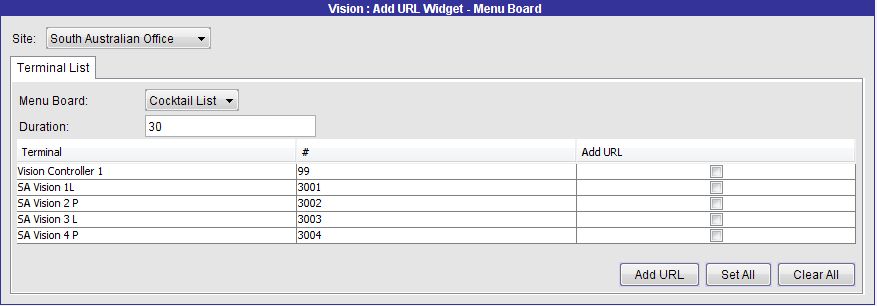
The final step is to display the menu board on one or more of your Vision terminals. This can be done by pressing the Add URL button which opens a screen that lists each of your Vision terminals in the site. Set the Duration and then add the menu board to each terminal by checking the box in the Add URL column as needed. You can use the Set All button to add the menu board to every terminal. Press the Add URL button to commit the change to the Portal. In the Vision URLs tutorial we will discuss how to set the display order of your menu boards in your Vision terminals.
In this tutorial we have investigated the ways in which you can create dynamic Menu Boards for display at your venue's Vision terminals. We have demonstrated how to create a cocktail list, but another possibility might be to display your bistro's specials near the point of sale during lunch service. As customers order their lunch, they are greeted with the current specials in a fresh and dynamic way. In the last tutorial in the Vision series, we will discuss the Vision terminals' URLs and how to configure what is displayed at the terminals in detail.